I just moved out to Nashville a couple months ago to start my new job, and the only bad thing about it so far (besides not being able to surf after work like I did almost every day in Charleston) is my bathroom. It’s an odd shape, and the switch for the fan is on the other side of the bathroom from the door, the light switch, and the shower! It’s conveniently placed by the toilet though, so go figure.
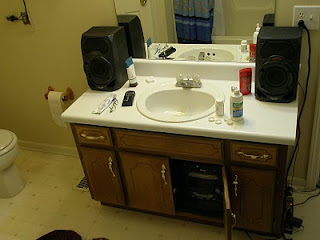
Before I talk about that, this first picture shows my first mod, bathroom speakers! I wanted to be able to listen to the stereo clearly while in the shower, without having to turn my regular stereo (two 600-watt MTX PRO-210 PA cabinets with five speakers each) up so loud it deafens my roommates. I wired the power and audio for it up to the regular amp, so as long as the switch is on in the bathroom it plays whatever the main stereo is playing (volume-independent). This has been convenient for watching TV, since my TV is on the stereo too, when I walk in the bathroom I only miss out on half of the TV-watching experience now. I guess I could just push pause, but what’s the fun in that?
Any way, the main problem was that my fan wouldn’t turn on when I wanted it to, usually when I was in the shower. I could take the extra effort to hike across my bathroom EVERY TIME I want to take a shower without all the humidity, but if I was that kind of person I probably wouldn’t have used a microcontroller to operate my kitchen lights in my last apartment just so I wouldn’t have to get off the couch. I also have a tendency to be a little absent-minded so I normally just forgot to turn the fan on when I get in the shower. So I decided to do this so that the fan would come on with the lights. Extra incentive for putting this in was the addition of the stereo, it probably doesn’t like the shower humidity too much.
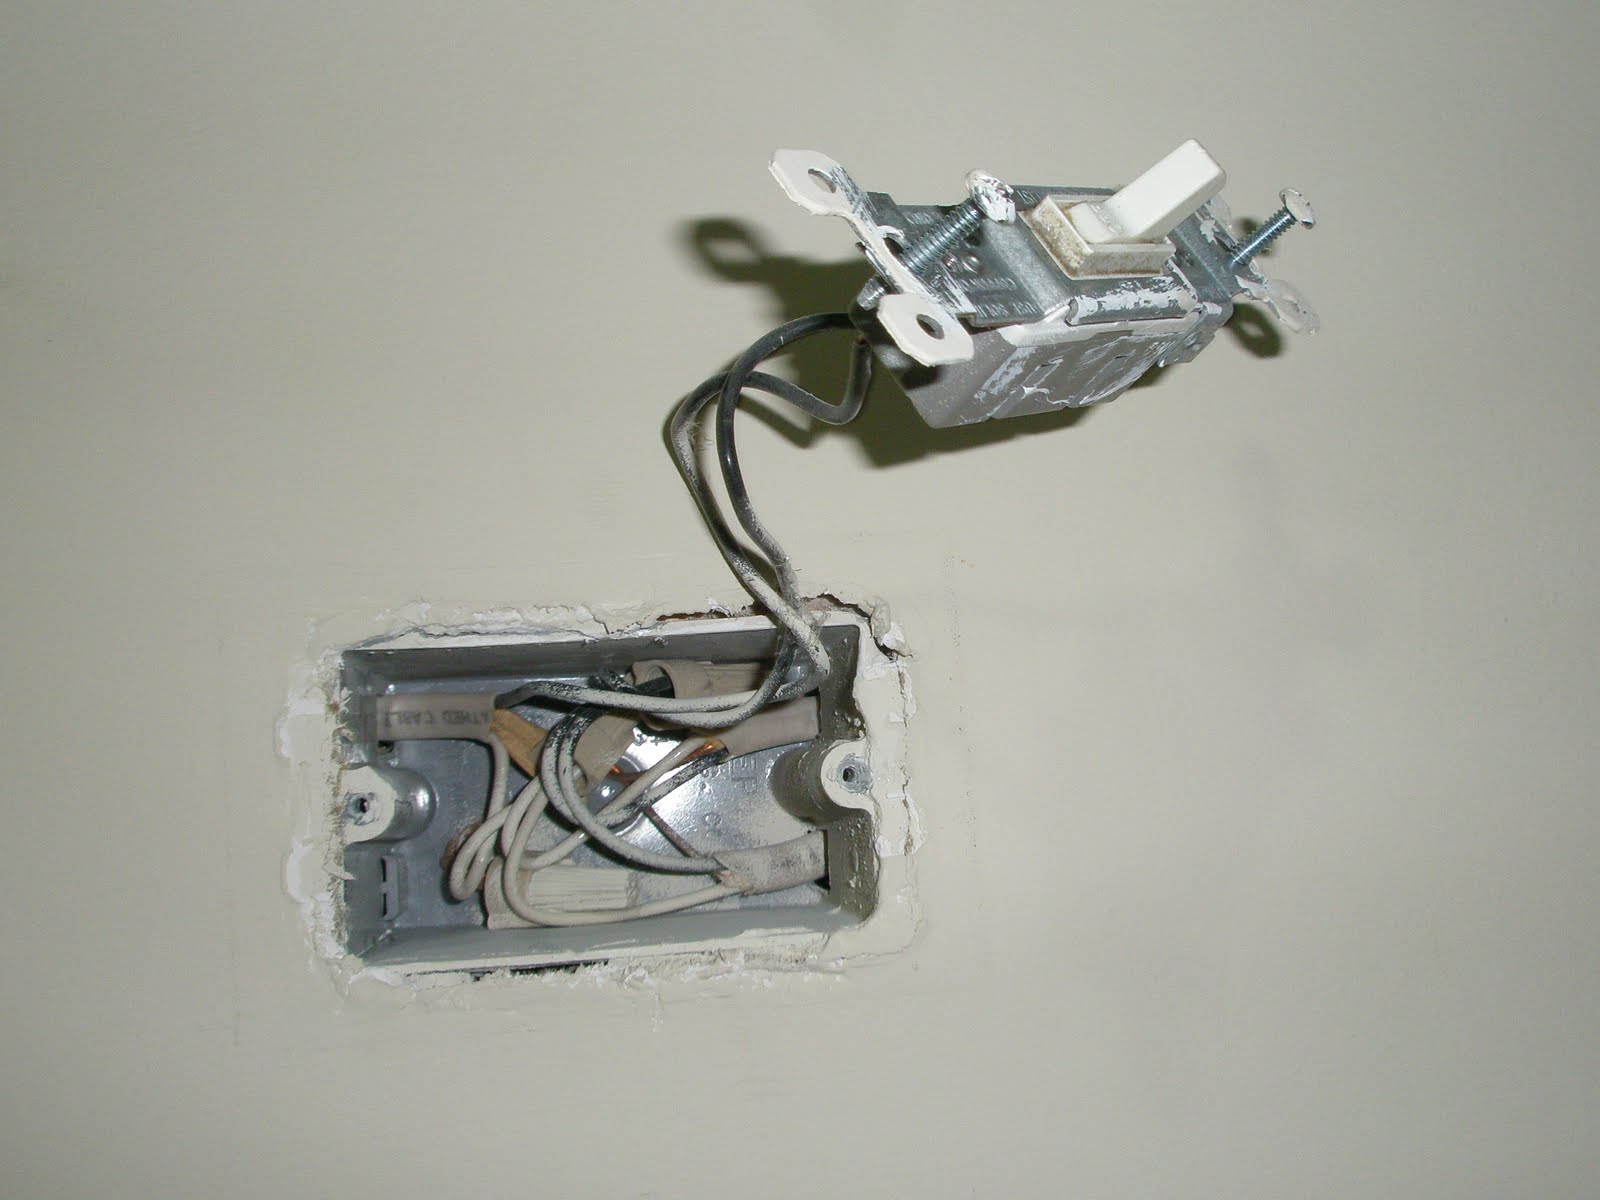
I wanted a switch to operate the fan too. I found a three-position double-pole double-throw center-off switch in my truck’s toolbox. With the switch up, the fan is on all the time, with it in the center it is off all the time, and with it down it is on when the lights turn on.
The operation with the lights was accomplished with a 120V AC relay shown in the above picture on the right. I tapped into one of the lights using the same device I used in the fridge speakers post, and ran that to the coil on the relay. The relay and the three-position switch operate in parallel with each other.
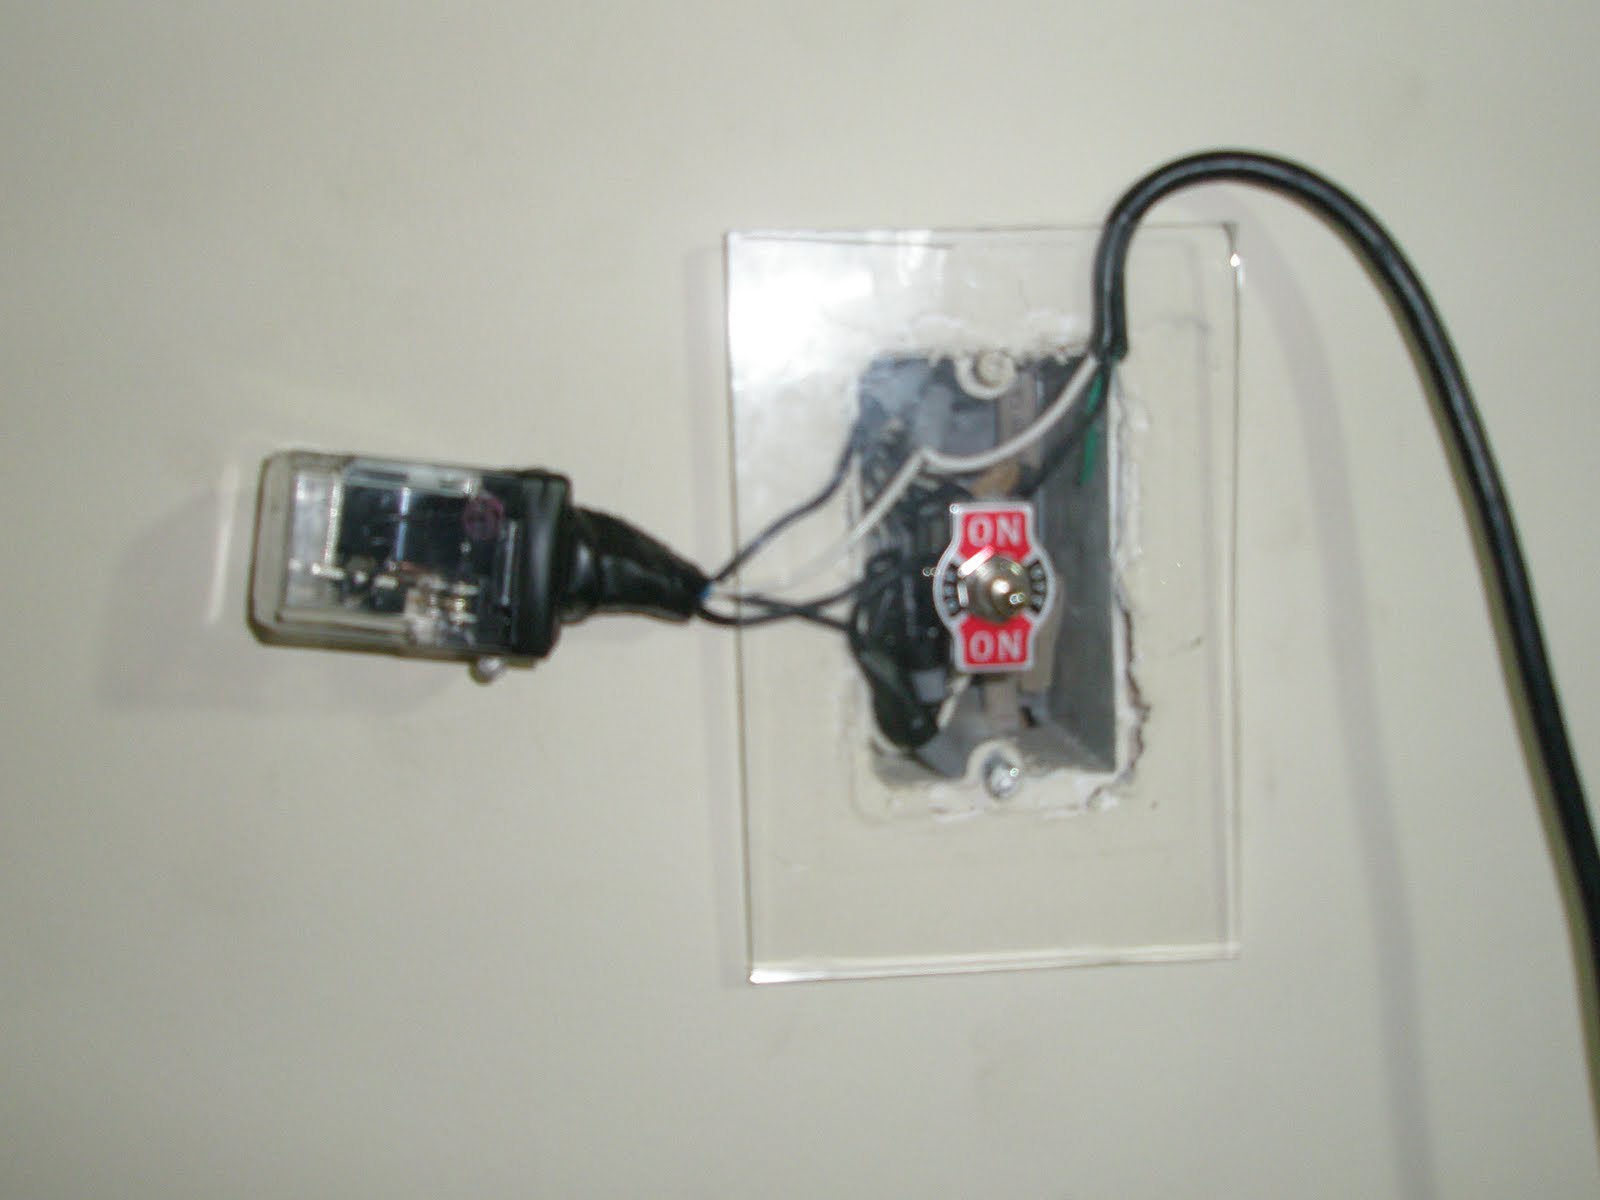
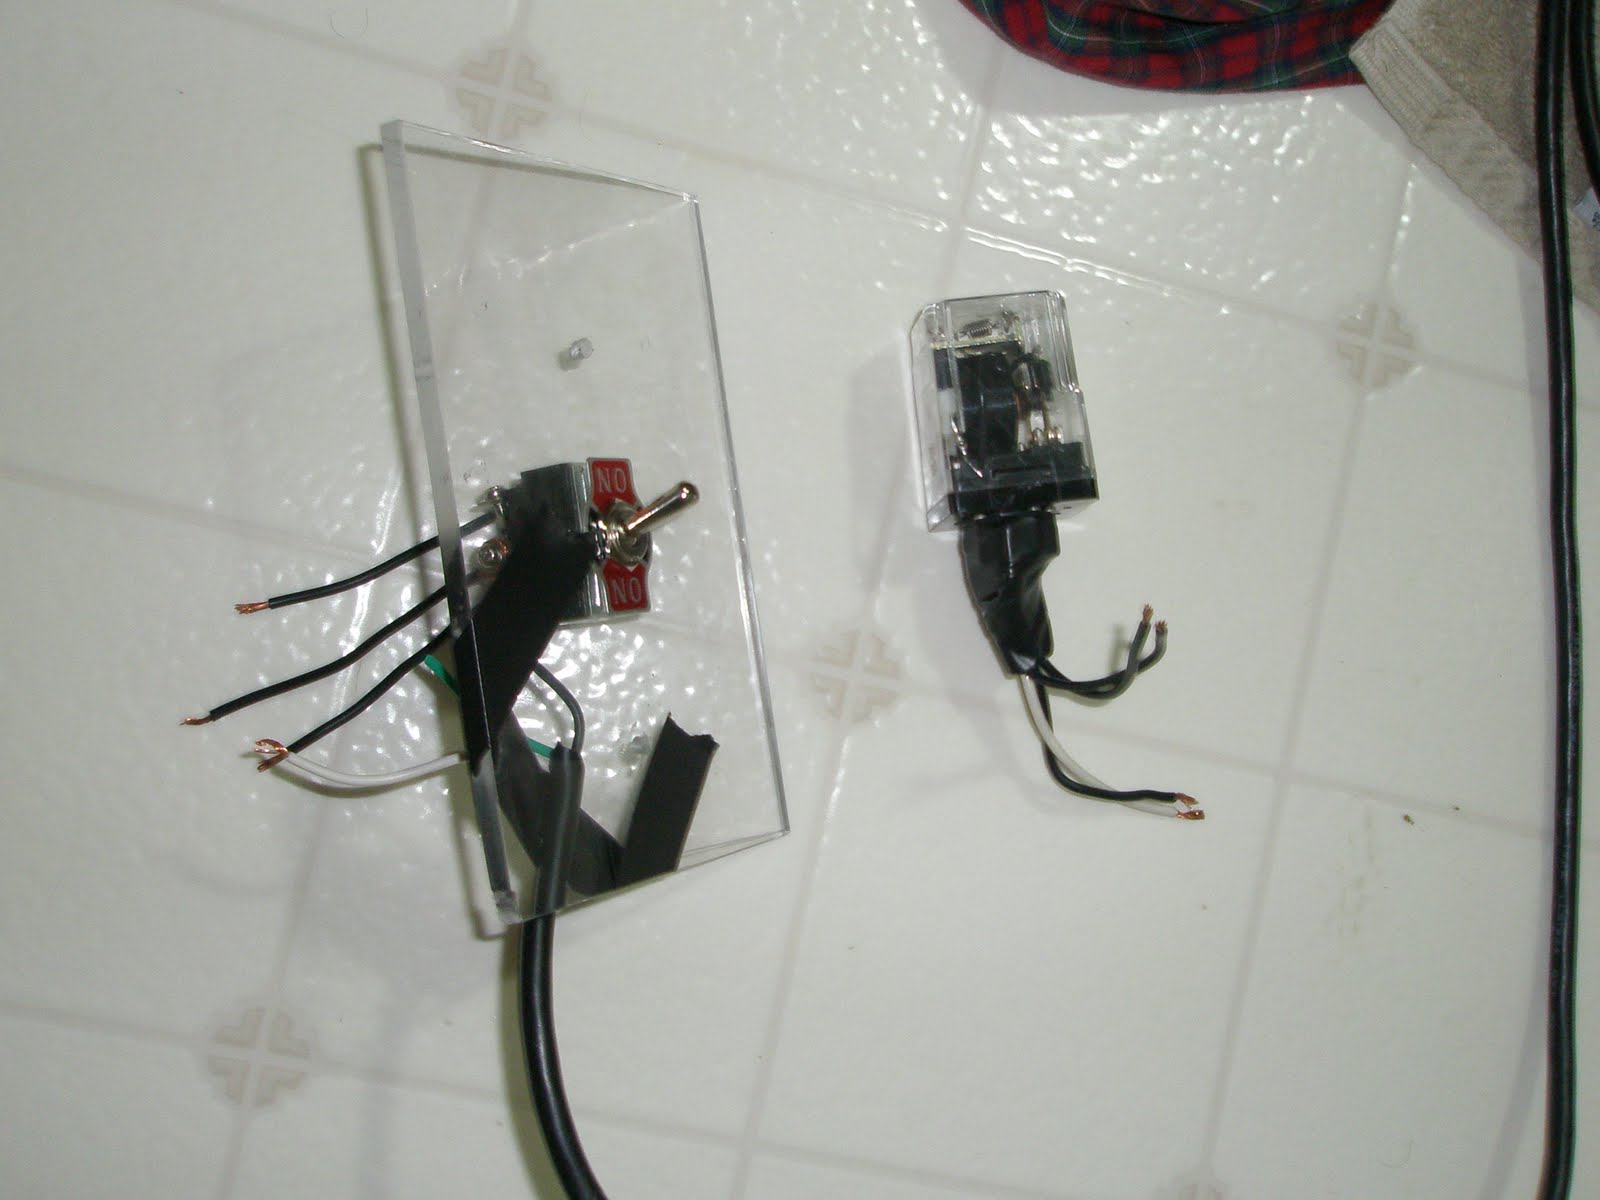
This was the final installation in a typical light switch junction box, and I scavenged the plexiglass cover from the apartment kitchen light switch. I wanted the relay inside the junction box but it wouldn’t fit with the switch, so I just taped it up real well and hung it outside. I soldered wires to the connectors, shrink-wrapped them, and then taped a few layers with electrical tape. Seems safe.
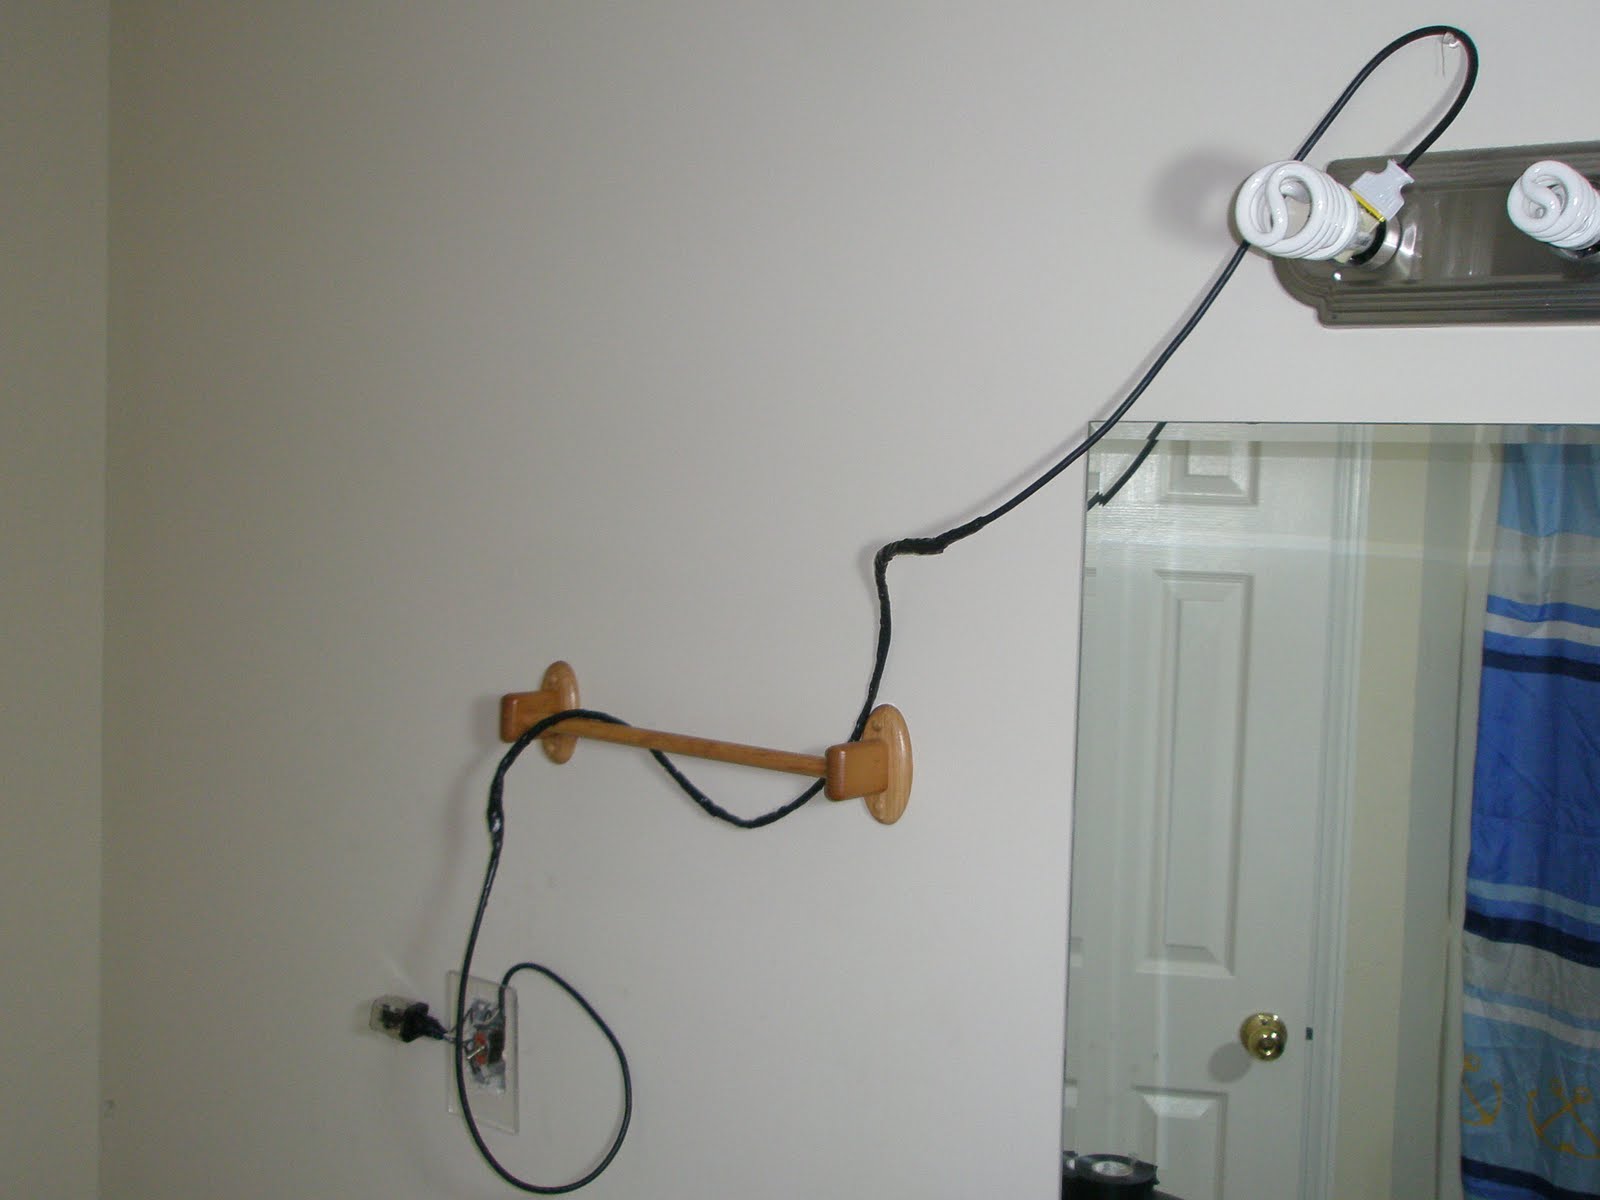
Above is the overall installation with the tap off of the lights that I mentioned earlier.
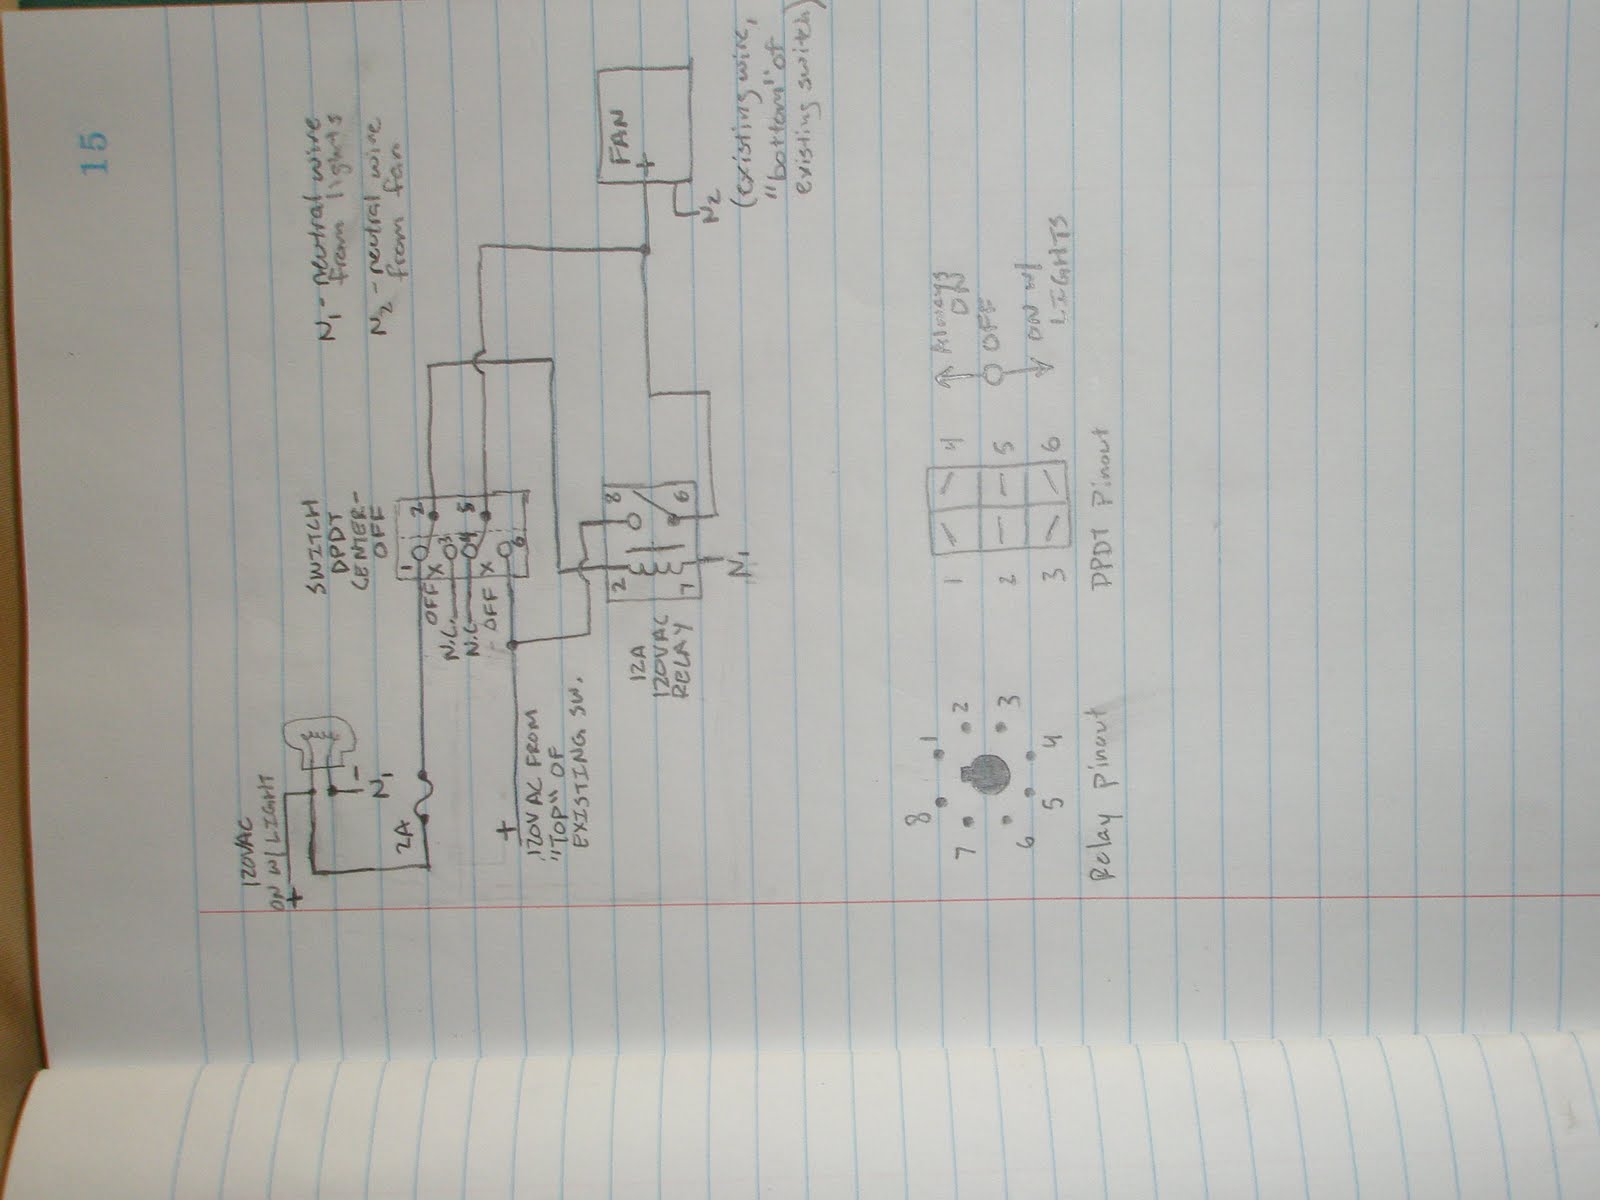
And the circuit diagram! Which apparently is sideways? Oh well. Tilt your head if you really want to see it! This shows the operation and wiring of every component in this project.
Hooray! Now due to all of this work and effort I can be a little more lazy. Engineering tends to work that way, and I’m OK with it.
If you want your ex-girlfriend or ex-boyfriend to come crawling back to you on their knees (even if they're dating somebody else now) you must watch this video
right away…
(VIDEO) Get your ex back with TEXT messages?