I use a china hutch from my grandmother’s old house as my entertainment center. I never really liked displaying all of one’s electronics and wires and stuff where everyone can see them, so this suits my needs quite nicely. HOWEVER! This particular piece of furniture doesn’t have very good ventilation for all of my heat-producing electronics, and it has a tendency to get a bit toasty inside the cupboard unless I left a door open. I decided to fix that by putting some exhaust fans on the outside and hooking them up to an ATtiny45 microcontroller and a temperature sensor. Now, when the temperature inside the hutch rises beyond a certain level (around 95 degrees F) the fans are turned on so the Playstation 3 and Crown amplifier don’t overheat in the modified entertainment center.
The first step was the prototyping! I had a HUGE problem here with what should have been a simple circuit. The output of the voltage sensor was supposed to be around 0.75V at room temperature, and it would increase linearly as the temperature increased. (I used a hair dryer to model temperature fluctuations.) I was not getting any sort of reliable data from the sensor whenever the microcontroller was attached to the power rails of the circuit, but I found out that this was due to a lack of “decoupling capacitors” that I had failed to place near the sensor and on the power rail. I’m not 100% sure how this solved my problem, but as an engineer I’m not bound by the need to find answers, but rather simply by a need to get whatever it is working.

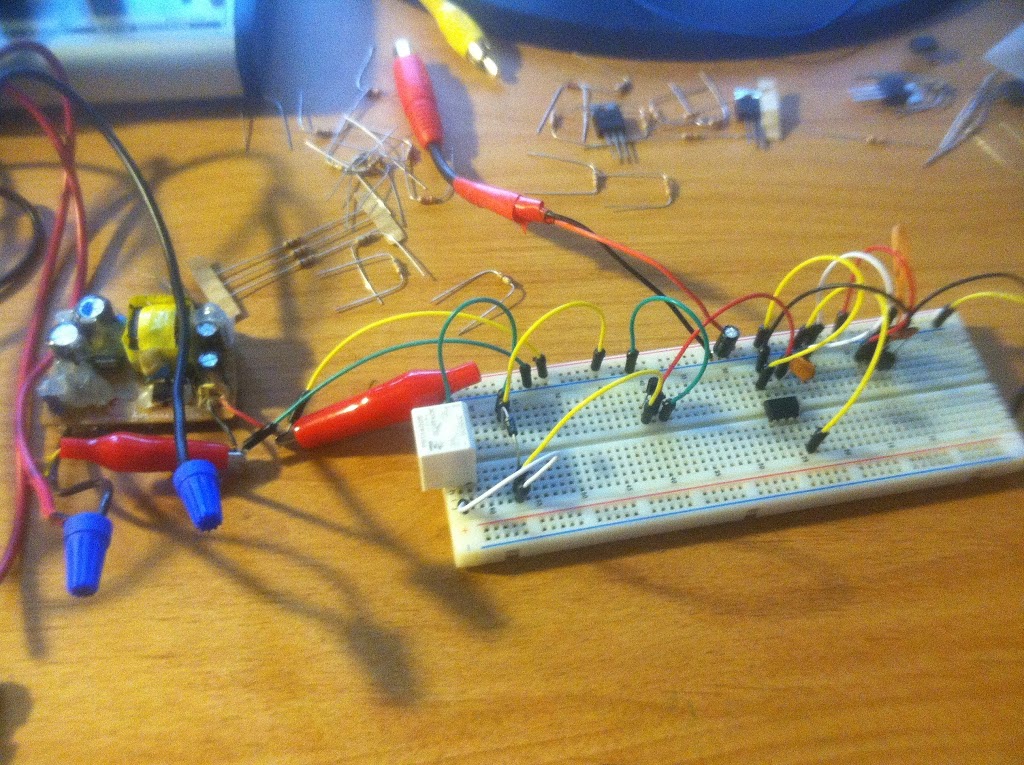
Soldering everything together. The red/black wires sticking out of the top of the circuit go to the power supply, which I stole from an old cell phone charger. +5V from a SMPS saves me the time of building a power supply (trivial, but sometimes frustrating). The wires to the right are my dead-bug soldering of the temperature sensor and decoupling capacitor. These will be outside of the enclosure that the rest of the electronics will reside in:


I mounted the fans to the cardboard backing of the “entertainment center”. The one on the bottom right blows in, and the one on the upper left blows out, for a nice circulating effect.

Everything put together! I was told that my color scheme is a little off, but at least it looks better now without the doors wide open any time I want to turn the TV on or listen to music.
HERE’S THE CODE! I’ve had to make some changes to the temperature settings. At first the fans would kick on and off once every five to seven minutes, which I thought was too fast. Then I changed the settings and they wouldn’t come on at all. I think I have it JUST RIGHT now.
/*
this program turns a switch on at approximately 90 degrees
it turns the switch off at approximately 85 degrees
it is designed to be used with a TMP36 temperature sensor
output signal on/off is ATtiny pin 5 (digital pin 0)
input signal from TMP36 is ATtiny pin 7 (analog pin 1)
*/
#include <avr/io.h>
#include <util/delay.h>
//setFlag keeps the program from continuously writing pins
//if it doesn’t need to. this makes it one-shot and hopefully
//saves a few bits of energy
int setFlag = 0;
void setup() {
//set pin modes
pinMode(0, OUTPUT);
pinMode(2, INPUT);
//turn on the fans to make sure the program is working
digitalWrite(0, HIGH);
_delay_ms(2000);
//then turn them off to allow the program to run
digitalWrite(0, LOW);
_delay_ms(500);
}
void loop() {
//measure the voltage at pin 7:
int sensorValue = analogRead(1);
//calculate the voltage. at room temperature it should be around .760V
float volts = sensorValue * (5.0 / 1024.0);
//calculate the temperature in Celsius
float degC = (100.0 * volts) – 50.0;
//make a decision about whether or not to turn the fan on or off
//the microcontroller effectively acts as a schmitt trigger
if (degC > 32 && setFlag == 0) {
digitalWrite(0, HIGH);
setFlag = 1;
}
if (degC < 25.5 && setFlag == 1) {
digitalWrite(0, LOW);
setFlag = 0;
}
//only take a reading once every 10 seconds
_delay_ms(10000);
}
You might be qualified to get a Sony PS4.