WHILE the idea of this project and what it will accomplish may not seem like much, I think for me it was more of a challenge to see if I could implement it. After all, the whole basis of engineering is making life easier for everyone else, and I suppose even if this project will only make the life of my roommates, me, and our visitors only trivially easier then that’s positive engineering. The idea was something that is frequently talked about amongst anyone in the apartment.
We have a nice Mitsubishi projector here in the apartment in Clemson, but we have a set of 35W fluorescent light bulbs in the kitchen that wash the picture out if they’re on. Often, however, everyone is sitting down by the time this is realized. Any way, in an apartment full of engineers it has been mentioned many, many times that “we should build something so you can turn the kitchen light off from the couch” which I might add, is only about five feet away from the kitchen. Oh well.
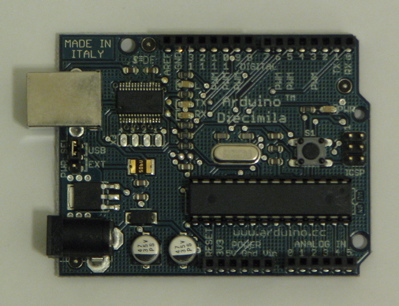
I have located an Arduino Diecimila microcontroller and will be attempting to program it for this project.
 Normally I would like to have a project like this implemented in hardware (I do not like to program things) but I determined that this would be rather difficult, as the system would have to have memory to determine if the state of the kitchen light, which would mean I would have to use a set of flip-flops for memory and THAT would require finding a clock circuit somewhere, so I would have effectively made my own computer. The microcontroller is just easier even though I have to program. Fun times. But Bradley, my Computer Engineering roommate, helped me with some of that, which is good, because electrical engineers SHOULD NOT have to program things. They should be out in the woods fixing power lines and building missiles and passing the dull programming tasks off to someone else. I guess some people like to program, which works out well for everyone. So that’s what computer engineers and computer scientists are for, I guess. Just kidding. But seriously.
Politics aside, here is the general design of the circuit that I worked out while semi-snowed in up in the greater Washington DC area a few weeks ago.

The idea here is that when either of two momentary pushbutton switches are pushed, the microcontroller will make a note of that and change the state of the light (from on to off or off to on). Also shown in my very unofficial-looking drawing is the pull-down configuration of the switches. I found two 33k-ohm resistors for this (they were the first large resistors to come out of the huge bag I have).
Also, since the microcontroller itself can not output enough current to activate the relay that will be switching the 120V 35W AC light, a current amplifier must be constructed. This is familiar territory for me, as it was a key part of my senior design project! Hooray for things from school being useful for a change. The drawing is somewhat inaccurate though, as I have decided to try and find a MOSFET somewhere instead of using a bipolar junction transistor like the TIP31 NPN transistor in the drawing. MOSFETs can typically handle more current for the same size integrated circuit, plus no current can get from the gate into anything and no current from the source to the drain can get back into the gate (under proper use and operating within the specifications of the transistor). This property will effectively isolate the relay circuit (operating at 12V DC) from the control circuit from the microcontroller (operating at 5V DC). I decided that a BJT was undesirable (or, at least, less desirable) since current can flow from the base of this type of transistor into the emitter or collector. It’s kind of the same principle as a relay. It’s better to use a low voltage source as a control circuit to switch the high voltage circuit, and to keep those two circuits electrically isolated. A MOSFET does these things.
So here is the prototype circuit that uses a 120V source and switches an LED on and off with a push of either of two red buttons.
I found a 120V AC to 12V DC power supply from a big box of junk. I was looking for 12V DC because not only does the relay operate on that much voltage, but the microcontroller can also run on 12V DC. Here’s the catch, though: This one, when measured, outputs around 18V DC under no-load and just under that with all of the load from this circuit on it. The top-right corner of the breadboard is my solution to this, a $2 12V DC voltage regulator from RadioShack that can receive up to 35V DC as an input and regulate it to 12V DC and 1 amp. I almost let the smoke out of this one though by wiring it up backwards. Whoops.
 The circuit works flawlessly. The yellow LED only represents the kitchen light. When the circuit is actually built, this will simply be a control wire leading to the gate of a MOSFET which will be used to operate a relay which will do the actual switching of the kitching light. Missing from this picture, however, is the MOSFET which I will get either from the electrical engineering building or RadioShack in the morning (or the late afternoon if my current sleep pattern is any indication of when I will wake up). I wired one of the pushbuttons to the relay to test its operation, though, and it works perfectly. One hitch I ran into was that before trying the pushbutton to operate the relay, I was just plugging it manually into the 12V supply. This worked for the relay, but when I manually unplugged it from the 12V supply I believe there was some sort of transient that I caused that caused the microcontroller to turn off. It didn’t happen reliably, so I plugged in the switch, assuming it could switch better and faster than I could plug in a wire to the breadboard. I was right about that, and it works pretty well. Assuming the MOSFET will allow the microcontroller to operate the relay, I will begin soldering it together in a permanent fashion tomorrow.
OH! I almost forgot. Here is the code I used to program the microcontroller.
const int lightPin = 12; // pin controlling the light via amp/relay
const int ledPin = 13;
const int wallPin = 2;  // input pin for kitchen wall switch
const int couchPin = 1;  // input pin for couch switch
//variables
int lightState = LOW;
int ledState = LOW;
int wallState = 0;
int couchState = 0;
int counter = 0;
int onoff = 0;
int timer = 0;
int k = 0;
void setup() {
// set pins as inputs or outputs
pinMode(lightPin, OUTPUT);
pinMode(ledPin, OUTPUT);
pinMode(wallPin, INPUT);
pinMode(couchPin, INPUT);
}
void loop() {
//read in the value of the wall and couch buttons. 1=depressed 0=not depressed
wallState = digitalRead(wallPin);
couchState = digitalRead(couchPin);
/*
//if the light is on, and the wall button is being held down, set the timer to 1
//if the button is held down to the length of the specified interval
if (onoff==1) {
for(k = 0; digitalRead(wallPin)==0; k++) {
delay(500);
digitalWrite(ledPin, HIGH);
delay(500);
digitalWrite(ledPin, LOW);
if(k>4) {
timer = 1;
counter = 0;
}
}
}
//if the timer was activated
if (timer == 1) {
digitalWrite(ledPin, HIGH); //turn on the LED to notify user that the timer was activated
delay(5000); //give 5 seconds before light is shut off, will need to change before this is implemented
digitalWrite(ledPin, LOW); //turn off LED
digitalWrite(lightPin, LOW); //turn off light
timer = 0; //reset timer
counter = 0; //reset the counter
onoff = 0; //remember that the light is off
}
*/
//first two IF statements register if a button was pushed
if (wallState == 1 && timer == 0) {
counter = 1;
}
if (couchState == 1 && timer == 0) {
counter = 1;
}
delay(400); //debounce input
//if a button was pressed and the light was on and the timer was not activated
if (counter == 1 && onoff == 1 && timer == 0) {
digitalWrite(lightPin, LOW); //turn the light off
onoff = 0; //remember that the light is off
counter = 0; //reset the counter
}
//if a button was pressed and the light was off and the timer was not activated
if (counter == 1 && onoff == 0 && timer == 0) {
digitalWrite(lightPin, HIGH); //turn the light on
onoff = 1; //remember that the light is on
counter = 0; //reset the counter
}
}
The idea about that commented-out part is that eventually someone (Randy or Bradley) can program the microcontroller to recognize certain inputs from the switches and activate a 30-second timer on the kitchen light. So, for example, if the kitchen light switch is held down for three seconds, the microcontroller will notice this and shut the kitchen light off after 30 seconds to allow the user to get out of the room with the light still on. (This will be kind of useful because the light switch layout in our apartment is pretty horrible.)
PART 2!
My first MOSFET!
OK I have the prototype circuit finished now. I bought a MOSFET at RadioShack which will act as a switch and activate the relay when the output from the microcontroller goes high. This is the finished prototype (that other switch’s wire broke after I made sure it worked):

The first problem! The packaging says that the transistor will turn on when the gate voltage is somewhere from 2 to 4 volts. Apparently, though, the transistor will only operate in weak inversion even when the input to the gate is at 5 volts. To get the transistor to operate in strong inversion, it needs a higher voltage than it says on the packaging. WAY TO GO RADIOSHACK. It took me quite a while to realize this but I have my semiconductors class to thank for giving me the knowledge to realize what was going on! (Basically, if the transistor doesn’t see a high enough voltage at the gate, it’ll only turn on a little bit instead of all the way, and turning on just a little bit wouldn’t allow enough current to pass through the coil of the relay to activate it.)
This led to the second problem. It was already late at night by the time I figured this out, and I couldn’t go to the store to buy more components, which I thought I needed because I had to find a way to make a 5V signal from the microcontroller into somewhere around a 12V signal. I thought at first I’d just buy a bipolar junction transistor and wire it up to activate the MOSFET, and while this would be easier to do, it seemed like a bit of overkill. Also, I couldn’t get to a store. So what I did instead was wire the 5V output of the microcontroller to the noninverting input on a Fairchild 741CN operational amplifier and the output of the amplifier to the gate of the mosfet. I configured the op amp as a non-inverting amplifier with a gain of 2 by using a 3k-ohm resistor and a 1.5k-ohm resistor, which doubled the 5 volt input signal to a 10-ish volt input signal. More than enough to allow the MOSFET to operate in strong inversion.
This led to the third problem. What was happening was the circuit would work perfectly for about ten seconds and then the relay would constantly switch on and off with about a half second interval between switching. My guess is there was some screwy wiring that was causing the MOSFET gate to charge up and then discharge suddenly, which caused the transistor to “turn on” and then “turn off” again over and over. My solution for this, since I couldn’t think of anything else to do, was to rip everything off of the breadboard and start over. Now the circuit works exactly as it was designed. Whenever either button is pressed, the relay changes state (which will operate the kitchen light directly). Now the only thing to do is solder it all together!
PART 3!
So the kitchen light switch was soldered together and installed tonight. Pictures!

This is the circuit, completely soldered together except for one of the switches, which is on the top case. Also as a side note, I figured out that the reason the relay was flipping on and off earlier is because both of the switches need to be plugged in to the microcontroller at all times otherwise it sees a floating value as one of the inputs and continues to toggle the relay.
PART 4!
Some housekeeping:
I added plexiglass covers to the light switch in the kitchen. I think it adds a little something special, but a picture should suffice:

I also have a note to one of my roommates in case he woke up early and couldn’t figure it out, I didn’t want him getting frustrated at me.
Next!